SKU: OT2043-A54 Artikelnummer: AB072 EAN: 4577243565130

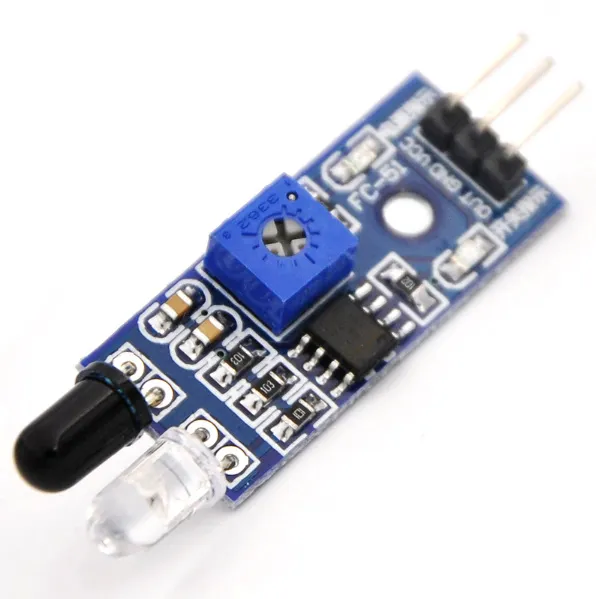
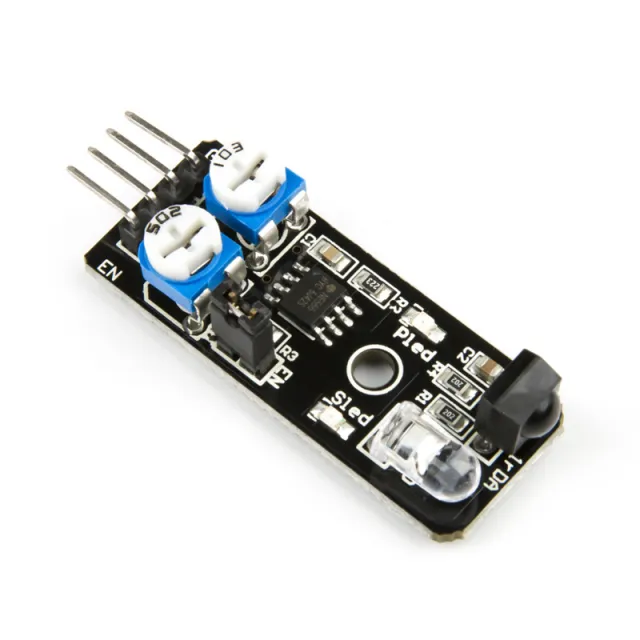
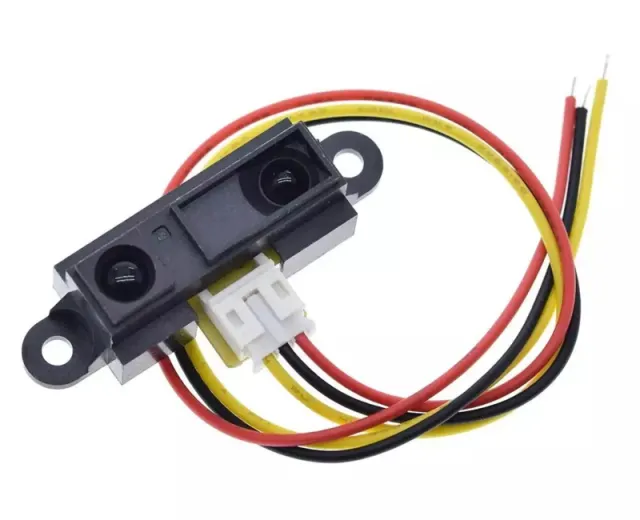
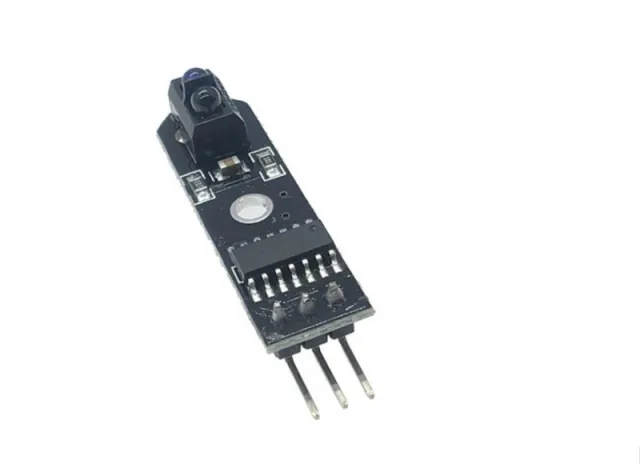
Infrarood obstakel vermijdingsmodule.
Geeft een 5V signaal als er geen obstakels zijn en een 0V signaal als er een obstakel is en de groene LED gaat branden. De afstand kan worden aangepast met een potentiometer. Werkt met 3.3V en 5V, heeft een rode power led.
Leest afstand tot obstakels op een afstand van 2-30cm en 35 graden door middel van infrarood signalen. Bevat een infrarood zender en ontvanger.
Afmetingen
Lengte: 4,5cm
Breedte: 1,4cm
Hoogte: 0,9cm
Zo sluit je de Infrarood obstakel vermijdingsmodule HW-201 aan op een Arduino UNO of ESP32, met een voorbeeldsketch die je direct kunt uploaden.
Dit project gebruikt een HW-201 infrarood obstakelvermijdingssensor om objecten in de buurt te detecteren. Wanneer een obstakel binnen bereik komt, gaat de digitale uitgang van de sensor LOW, waardoor de ingebouwde LED van de Arduino aangaat en detectiewaarschuwingen naar de Serial Monitor worden gestuurd. Stel de onboard potentiometer op de sensormodule af om de detectieafstand te kalibreren.
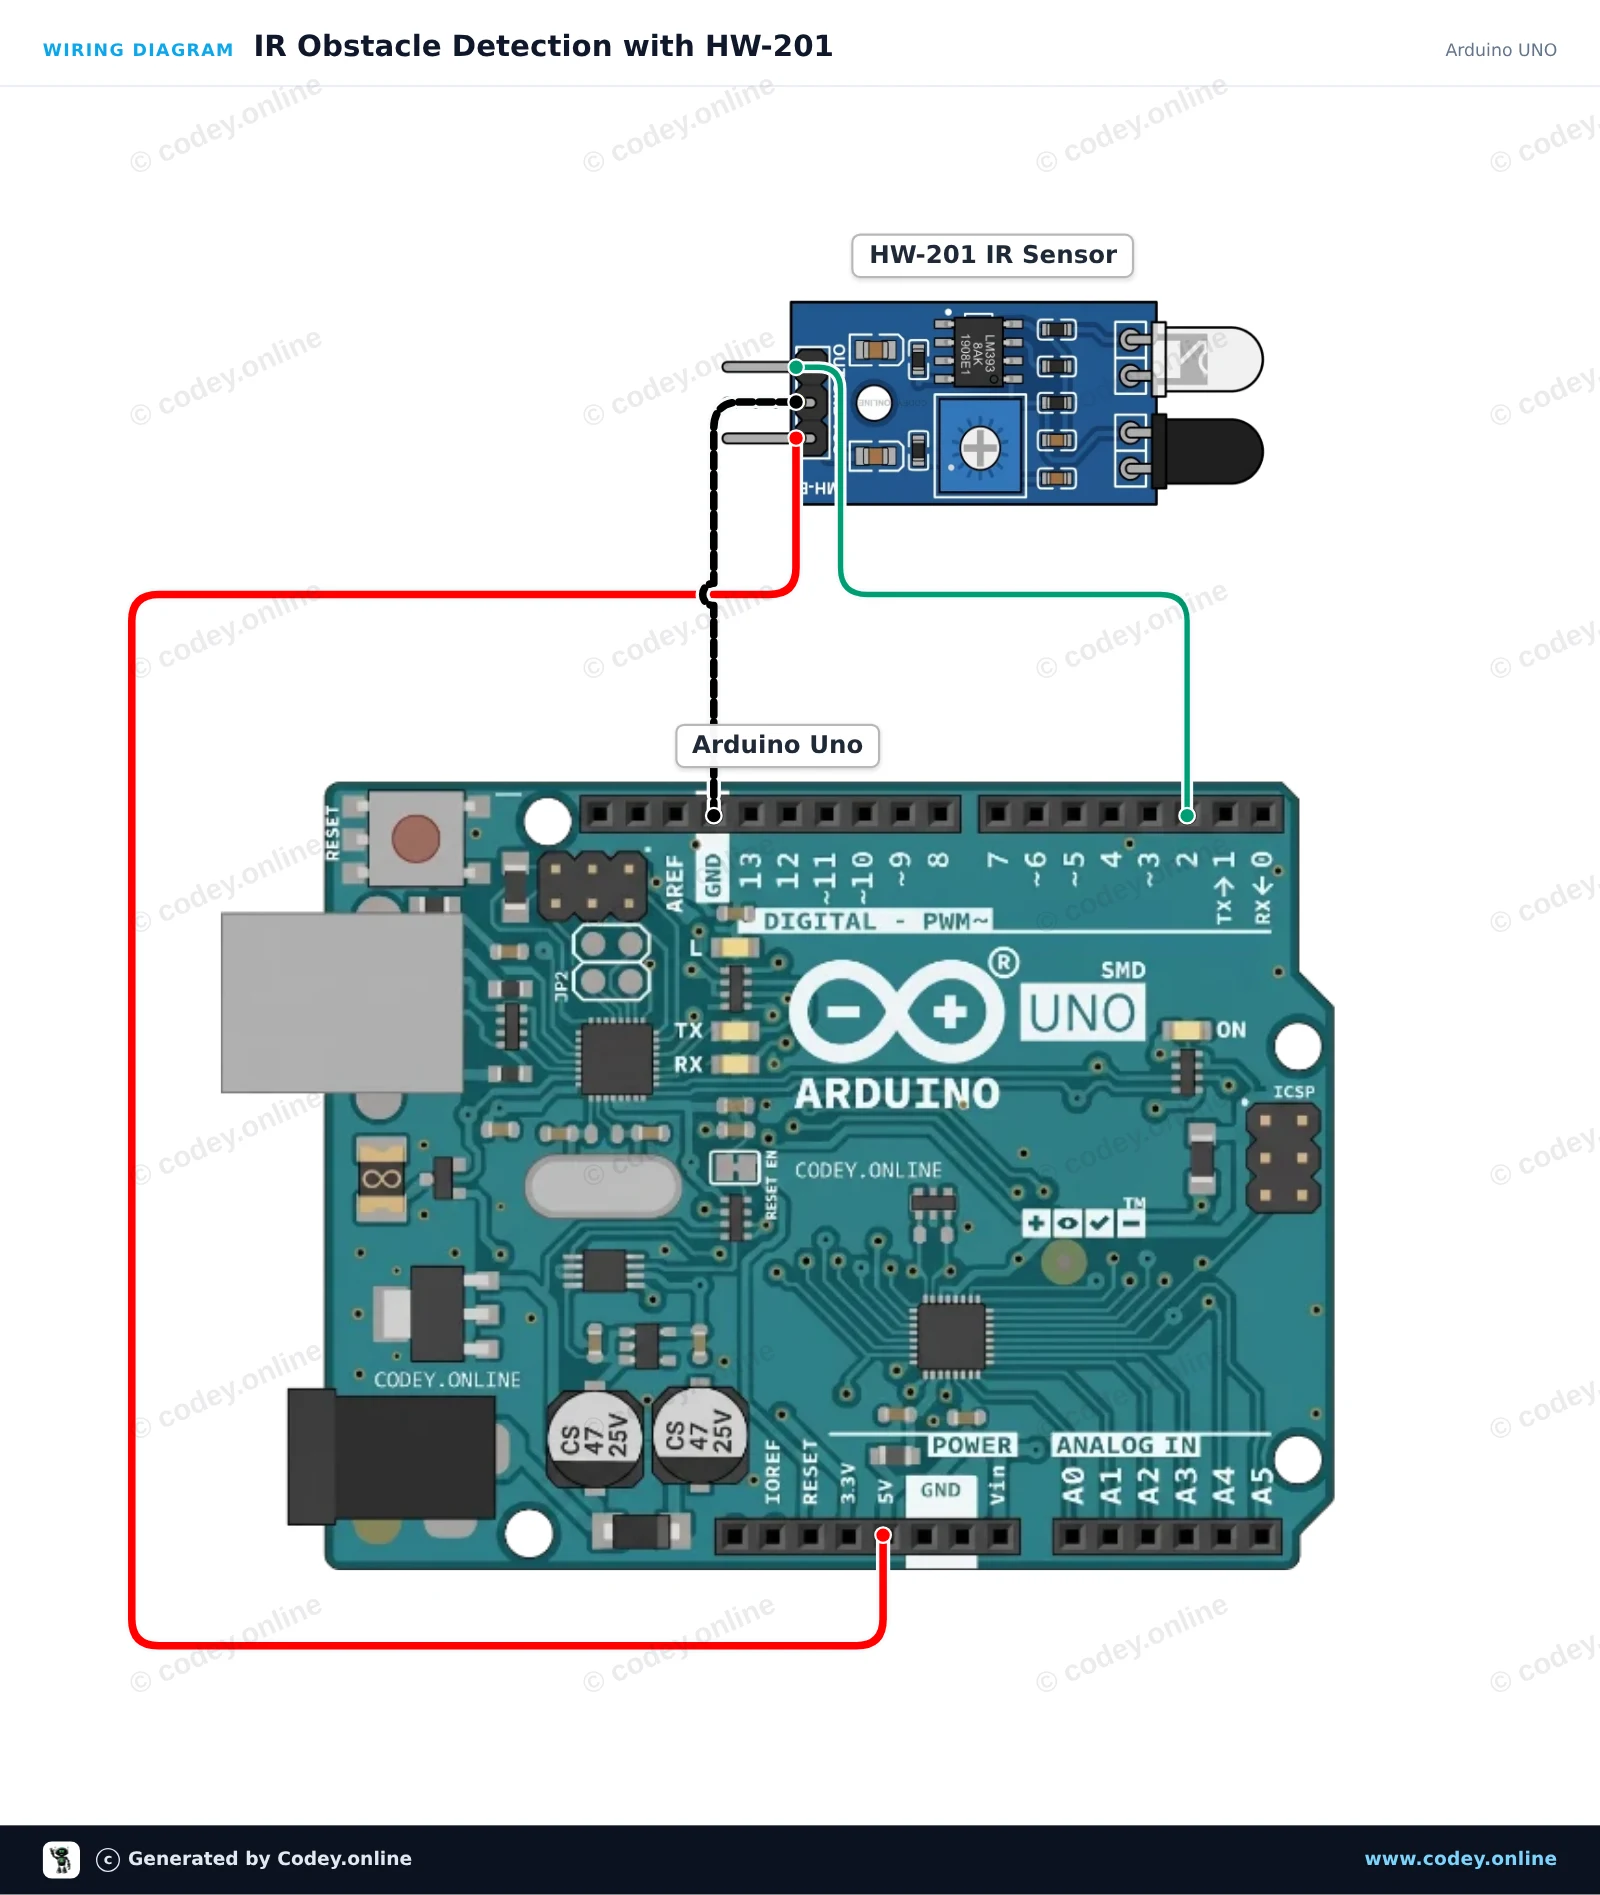
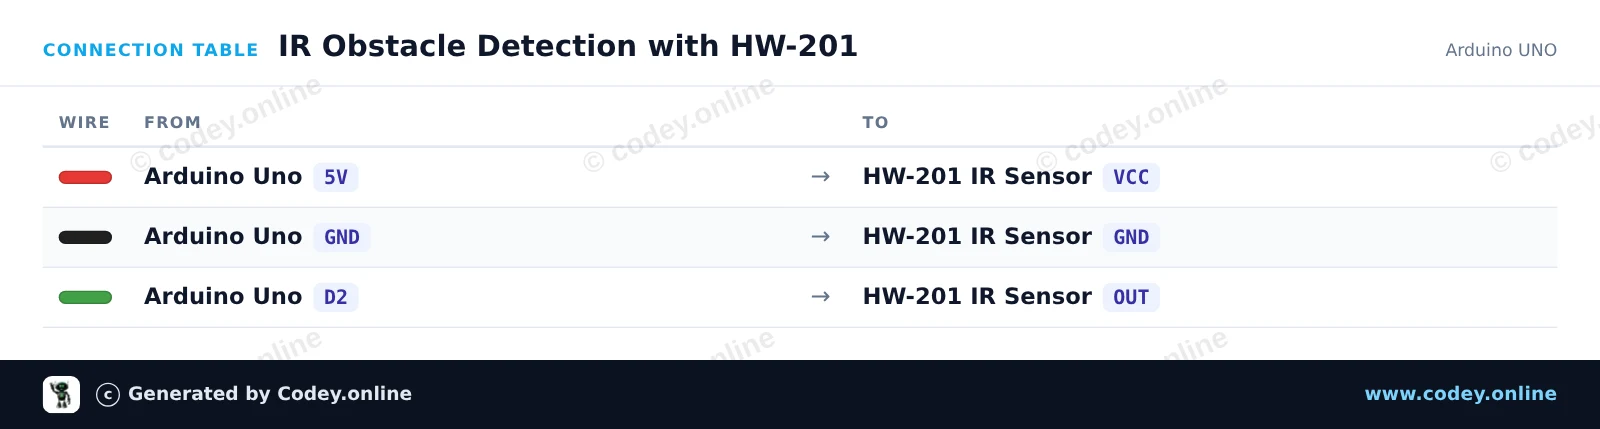
/*
 * ==================================================================
 *  Generated by Codey.online  —  https://www.codey.online
 * ==================================================================
 *  Project   : IR Obstacle Detection with HW-201
 *  Board     : Arduino UNO (arduino:avr:uno)
 *  Parts     : HW-201 Infrared Obstacle Avoidance Module
 *  Libraries : none (built-in)
 *
 *  Codey Online is an AI-powered browser IDE for Arduino and ESP32.
 *  Describe your project and Codey writes the code, draws the wiring
 *  diagram and uploads it to your board, straight from the browser.
 *  This code is free to use, modify and share, without warranty.
 * ==================================================================
 */

// Pin definitions
const int sensorPin = 2;
const int ledPin = 13;

void setup() {
  pinMode(sensorPin, INPUT);
  pinMode(ledPin, OUTPUT);

  Serial.begin(115200);
  Serial.println(F("HW-201 IR Obstacle Sensor Demo"));
  Serial.println(F("Ready: Move an object in front of the sensor."));
}

void loop() {
  // The HW-201 sensor outputs LOW when an obstacle is detected
  int sensorState = digitalRead(sensorPin);

  if (sensorState == LOW) {
    digitalWrite(ledPin, HIGH);
    Serial.println(F("Obstacle Detected!"));
  } else {
    digitalWrite(ledPin, LOW);
    Serial.println(F("Clear (no obstacle)"));
  }

  delay(200);
}Wiring diagram and example code generated by Codey.online — https://www.codey.online
Dit project leest de digitale output van de HW-201 Infrared Obstacle Avoidance Module. Wanneer een object binnen bereik wordt gedetecteerd, gaat de sensoruitgang LOW, waardoor de ingebouwde LED van de ESP32 oplicht en er een waarschuwing wordt afgedrukt in de Serial Monitor. Je kunt de detectieafstand aanpassen met de potentiometer op de module.
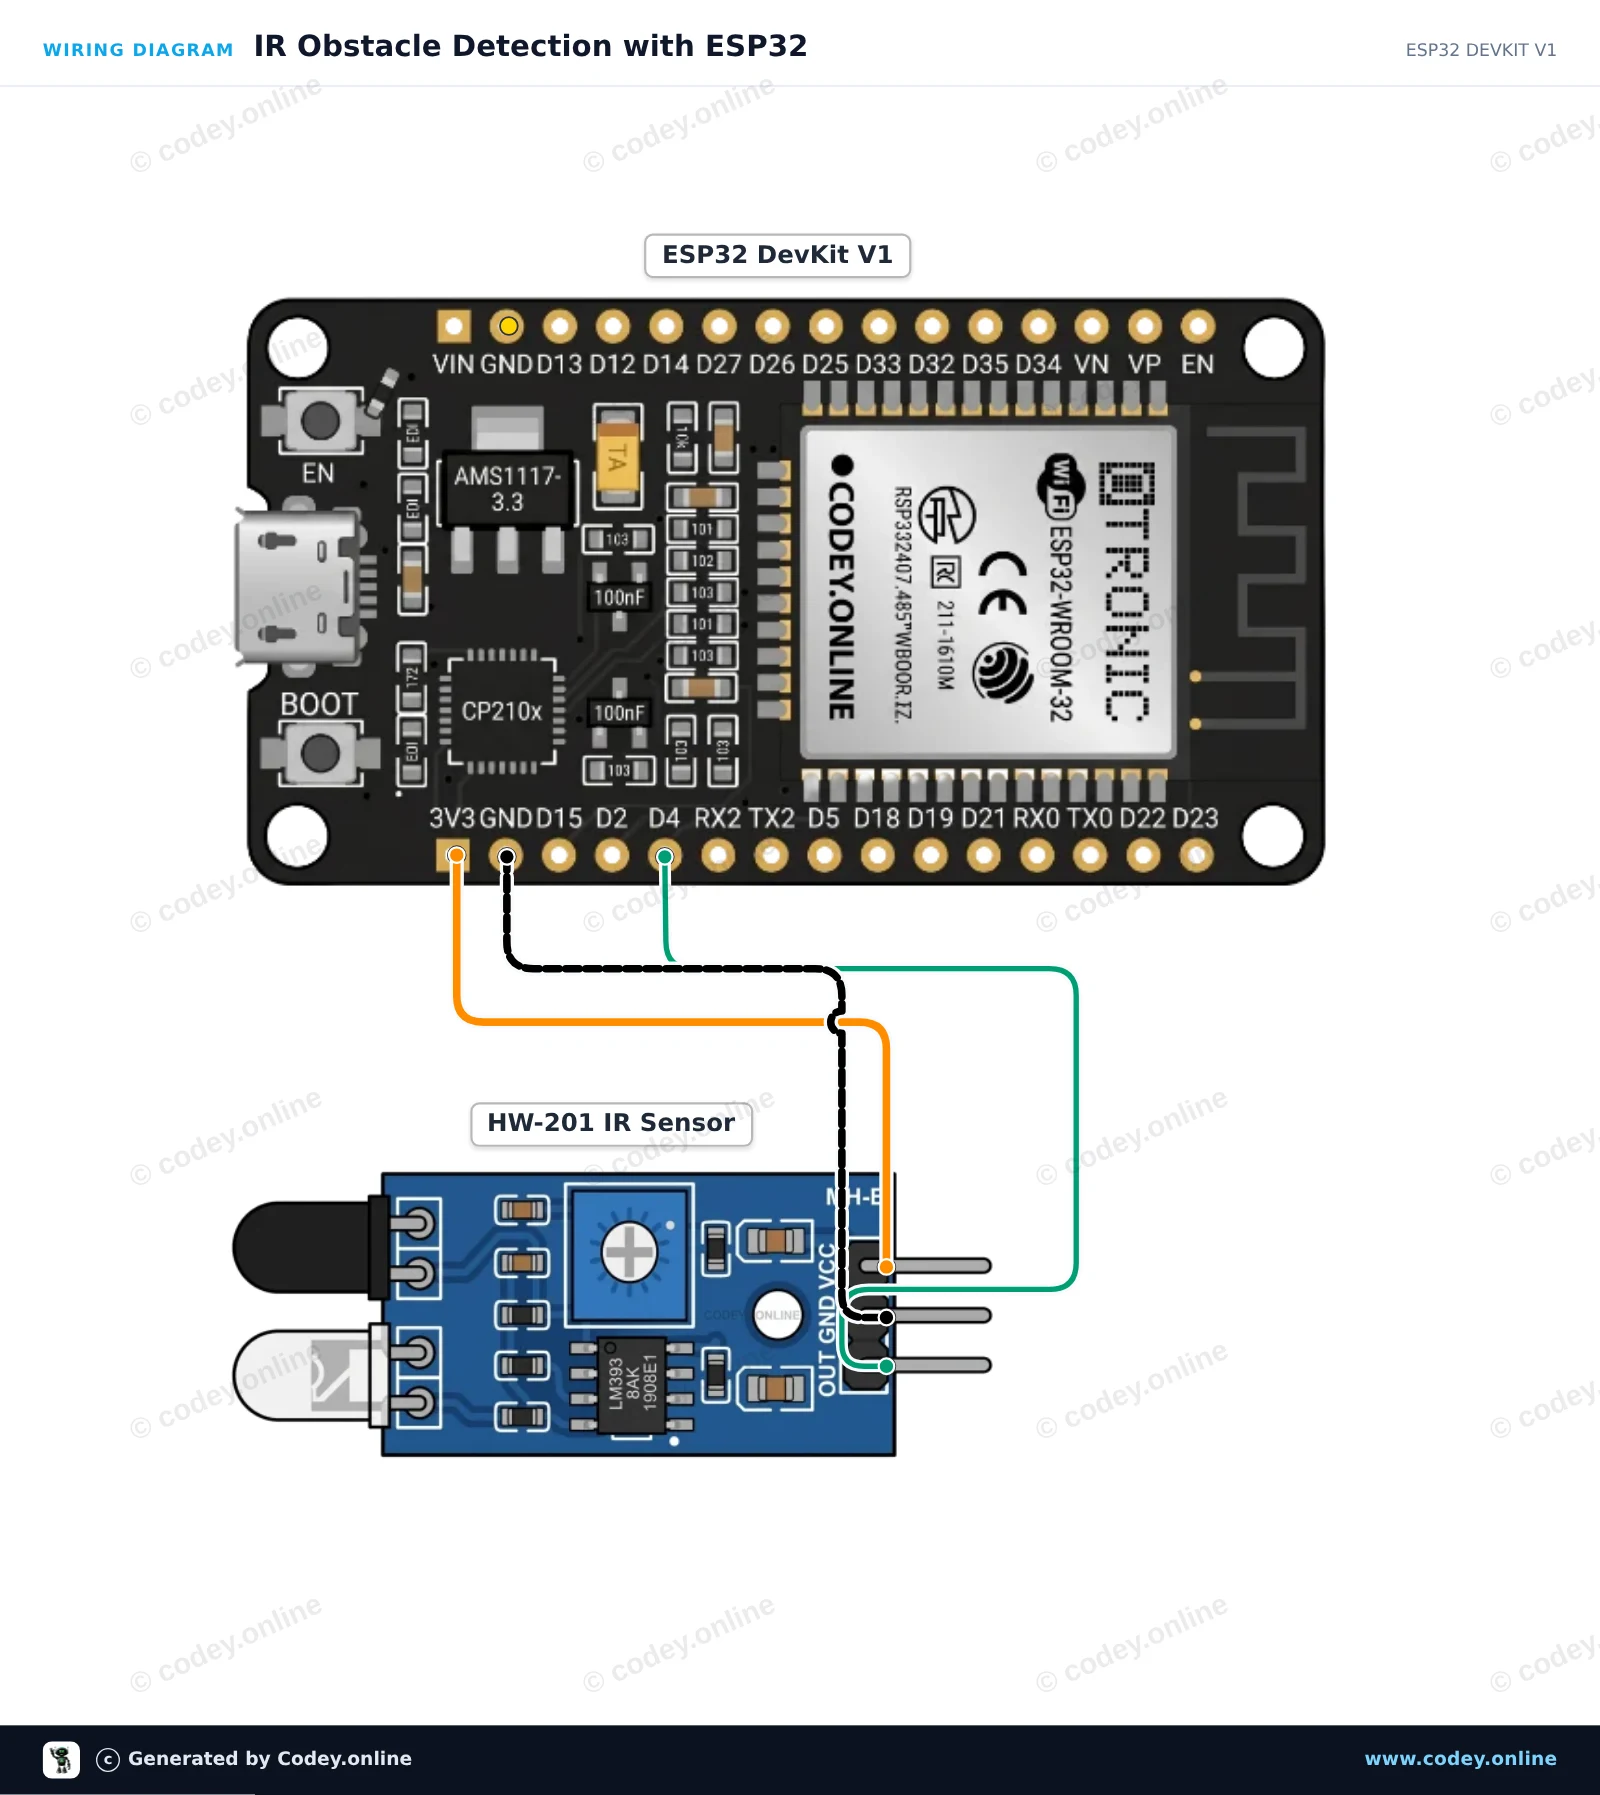
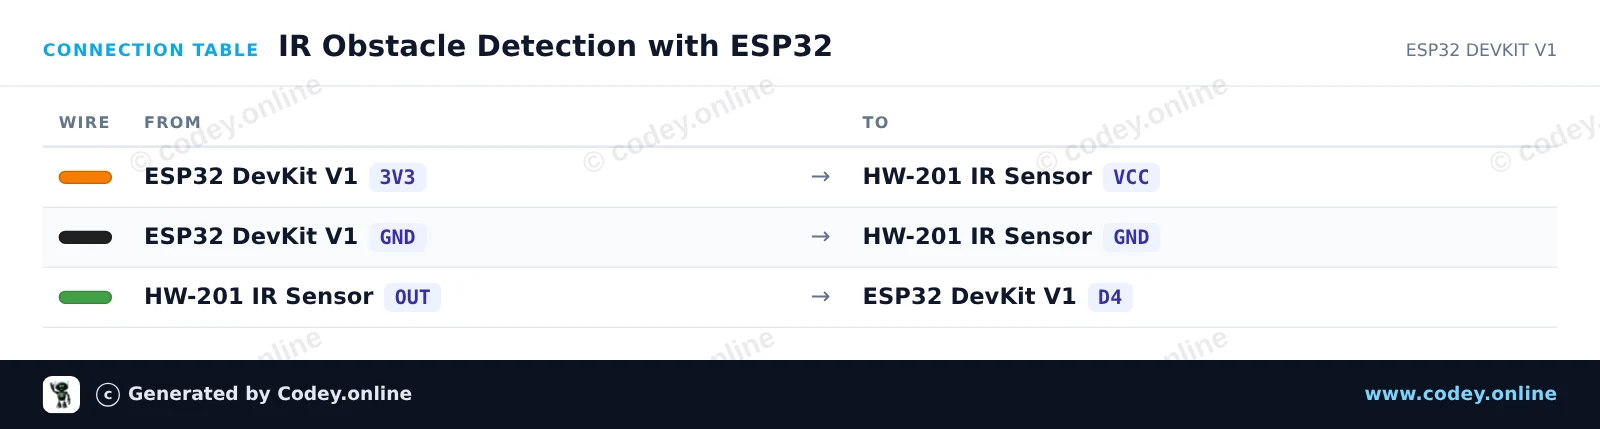
/*
 * ==================================================================
 *  Generated by Codey.online  —  https://www.codey.online
 * ==================================================================
 *  Project   : IR Obstacle Detection with ESP32
 *  Board     : ESP32 DEVKIT V1 (esp32:esp32:esp32doit-devkit-v1)
 *  Parts     : HW-201 Infrared Obstacle Avoidance Module
 *  Libraries : none (built-in)
 *
 *  Codey Online is an AI-powered browser IDE for Arduino and ESP32.
 *  Describe your project and Codey writes the code, draws the wiring
 *  diagram and uploads it to your board, straight from the browser.
 *  This code is free to use, modify and share, without warranty.
 * ==================================================================
 */

// HW-201 IR Obstacle Sensor with ESP32
const int SENSOR_PIN = 4;   // Connected to OUT pin of HW-201
const int LED_PIN = 2;      // Onboard LED

void setup() {
  Serial.begin(115200);
  pinMode(SENSOR_PIN, INPUT);
  pinMode(LED_PIN, OUTPUT);

  Serial.println("HW-201 Obstacle Sensor Ready");
}

void loop() {
  // The HW-201 output is active-LOW (LOW when an obstacle is detected)
  int sensorState = digitalRead(SENSOR_PIN);

  if (sensorState == LOW) {
    digitalWrite(LED_PIN, HIGH);
    Serial.println("Obstacle detected!");
  } else {
    digitalWrite(LED_PIN, LOW);
    Serial.println("Path clear");
  }

  delay(200);
}Wiring diagram and example code generated by Codey.online — https://www.codey.online





 English
  Suomi
Suomi  Ελληνικά
  Български
  Hrvatski
  Frans
Frans  Deutsch
  Italiano
  Español
  Polski
  Dansk
Dansk  Čeština
  Svenska
  Aileen