Ordered on weekdays before 14:00 = shipped the same day and delivered the next day in 98% of cases. Free returns 30-day reflection period 1-year warranty

Wiring diagram and code example

How to connect the 4x4 black matrix keypad to an Arduino UNO or ESP32, with an example sketch you can upload straight away.

4x4 Matrix Keypad Input Reader

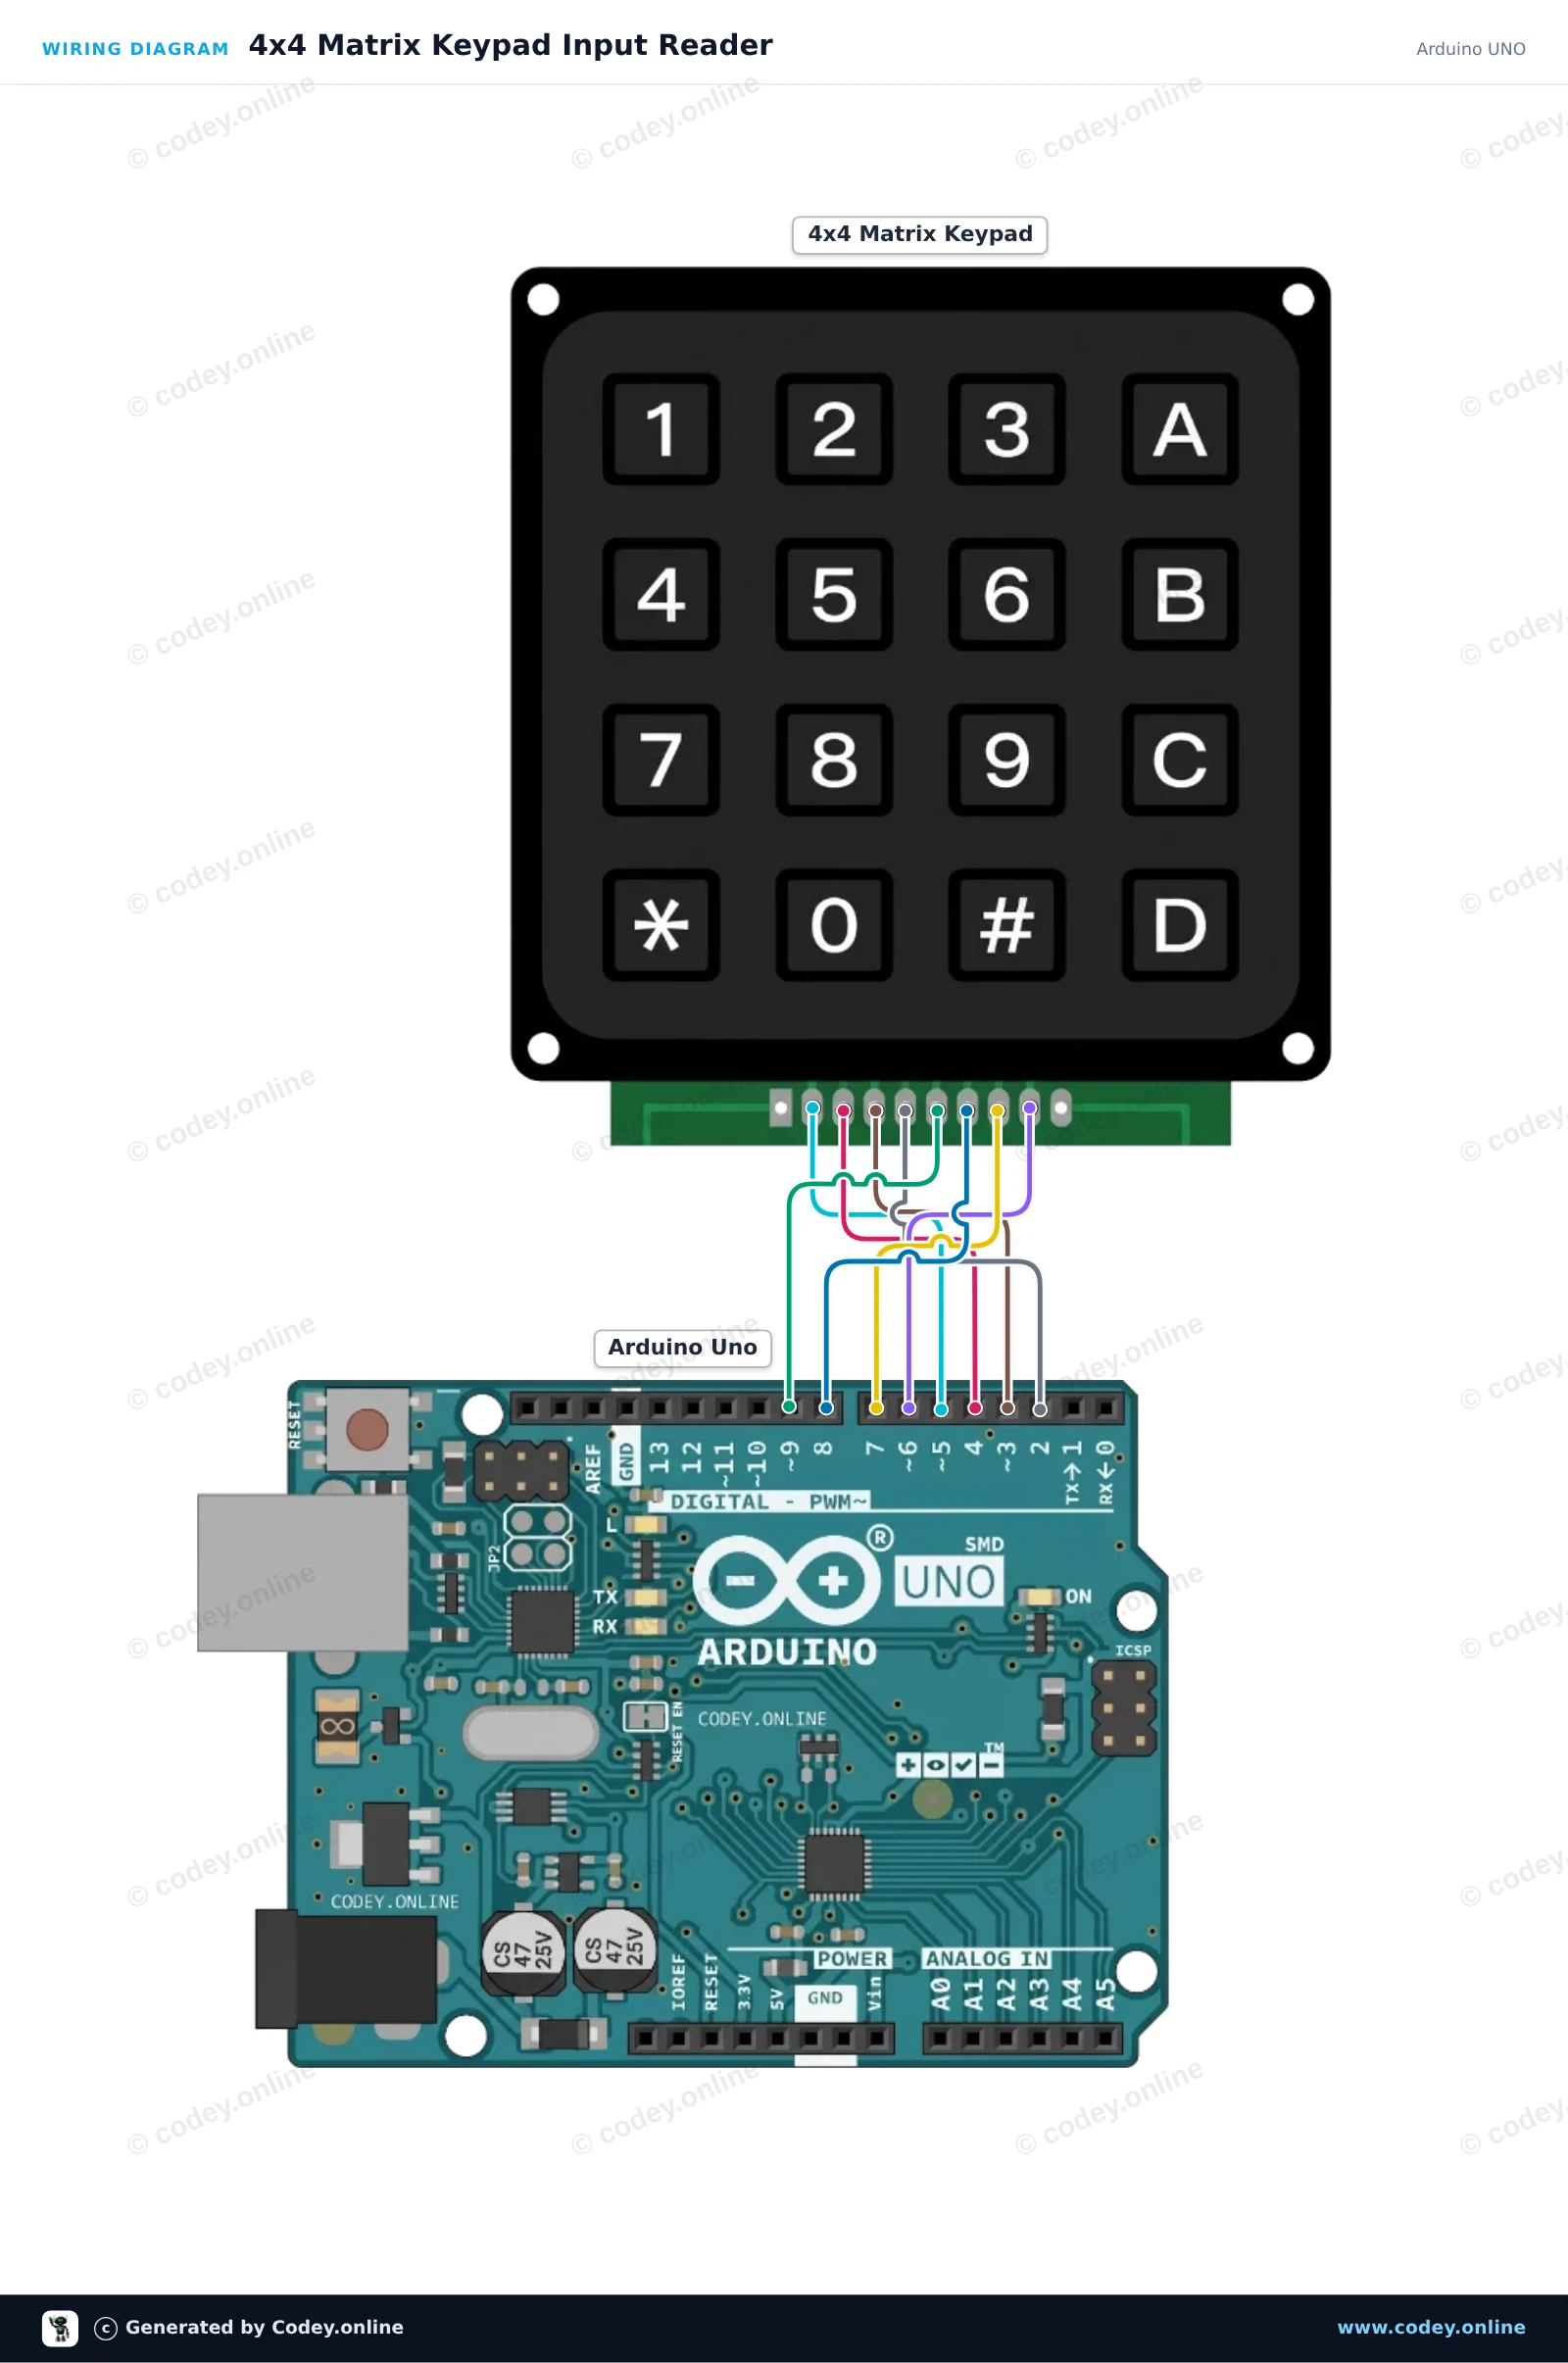
This project demonstrates how to read inputs from a 4x4 matrix keypad using an Arduino Uno. When any button on the keypad is pressed, the corresponding character is printed directly to the Serial Monitor at 115200 baud.

Wiring diagram: 4x4 black matrix keypad on an Arduino UNO
Wiring diagram · Click to enlarge
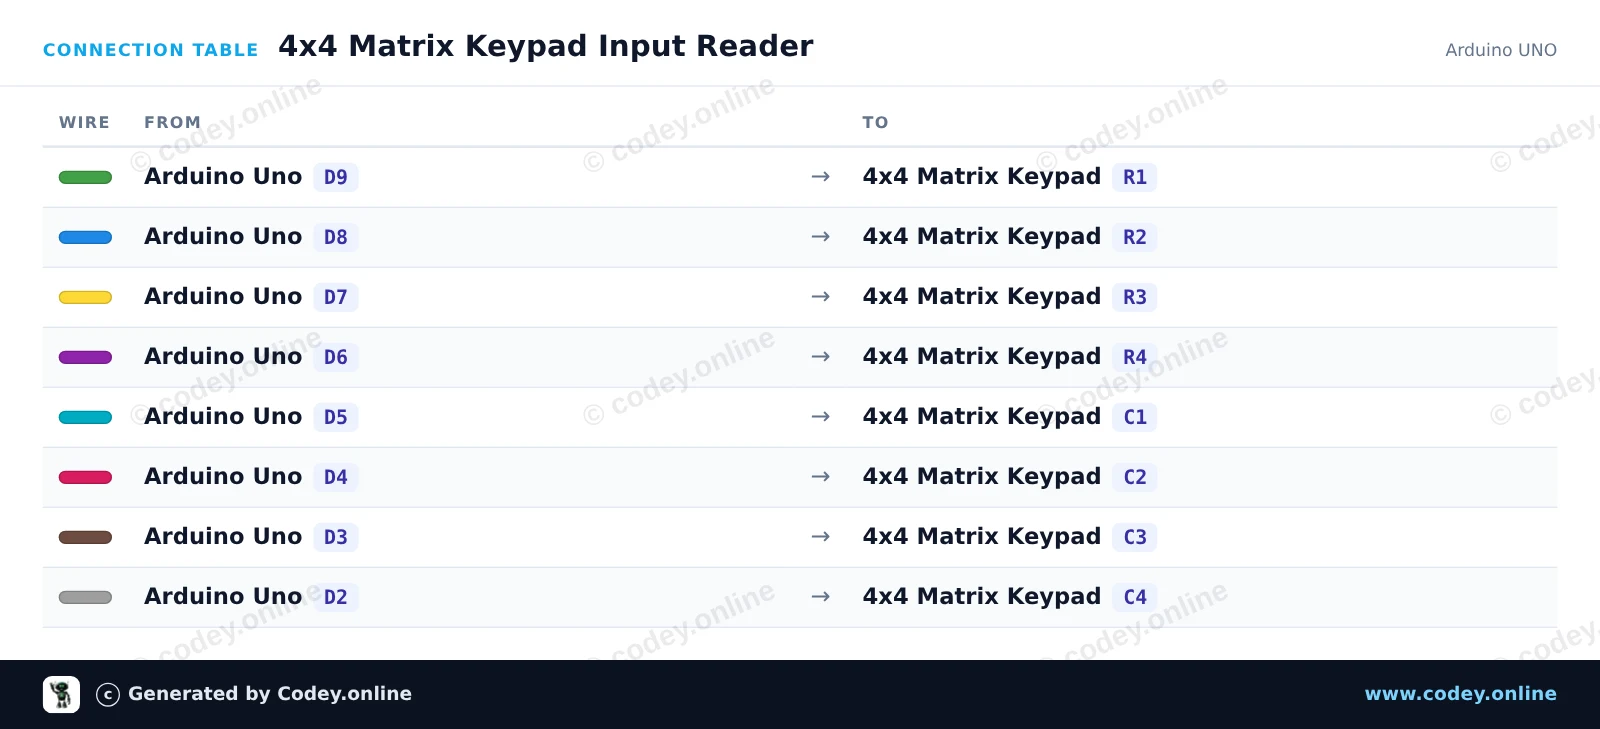
Connection table: 4x4 black matrix keypad on an Arduino UNO
Connection table · Click to enlarge
4x4_Matrix_Keypad_Input_Reader.ino · compiled and verified
/*
 * ==================================================================
 *  Generated by Codey.online  —  https://www.codey.online
 * ==================================================================
 *  Project   : 4x4 Matrix Keypad Input Reader
 *  Board     : Arduino UNO (arduino:avr:uno)
 *  Parts     : Keypad 4x4
 *  Libraries : Keypad 3.1.1
 *
 *  Codey Online is an AI-powered browser IDE for Arduino and ESP32.
 *  Describe your project and Codey writes the code, draws the wiring
 *  diagram and uploads it to your board, straight from the browser.
 *  This code is free to use, modify and share, without warranty.
 * ==================================================================
 */

#include <Keypad.h>

const byte ROWS = 4;
const byte COLS = 4;

char keys[ROWS][COLS] = {
  {'1', '2', '3', 'A'},
  {'4', '5', '6', 'B'},
  {'7', '8', '9', 'C'},
  {'*', '0', '#', 'D'}
};

byte rowPins[ROWS] = {9, 8, 7, 6};
byte colPins[COLS] = {5, 4, 3, 2};

Keypad keypad = Keypad(makeKeymap(keys), rowPins, colPins, ROWS, COLS);

void setup() {
  Serial.begin(115200);
  Serial.println(F("4x4 Keypad Demo"));
  Serial.println(F("Press any key on the keypad..."));
}

void loop() {
  char key = keypad.getKey();

  if (key) {
    Serial.print(F("Key Pressed: "));
    Serial.println(key);
  }
}

Required libraries: Keypad 3.1.1

Wiring diagram and example code generated by Codey.online — https://www.codey.online

ESP32 4x4 Matrix Keypad Reader

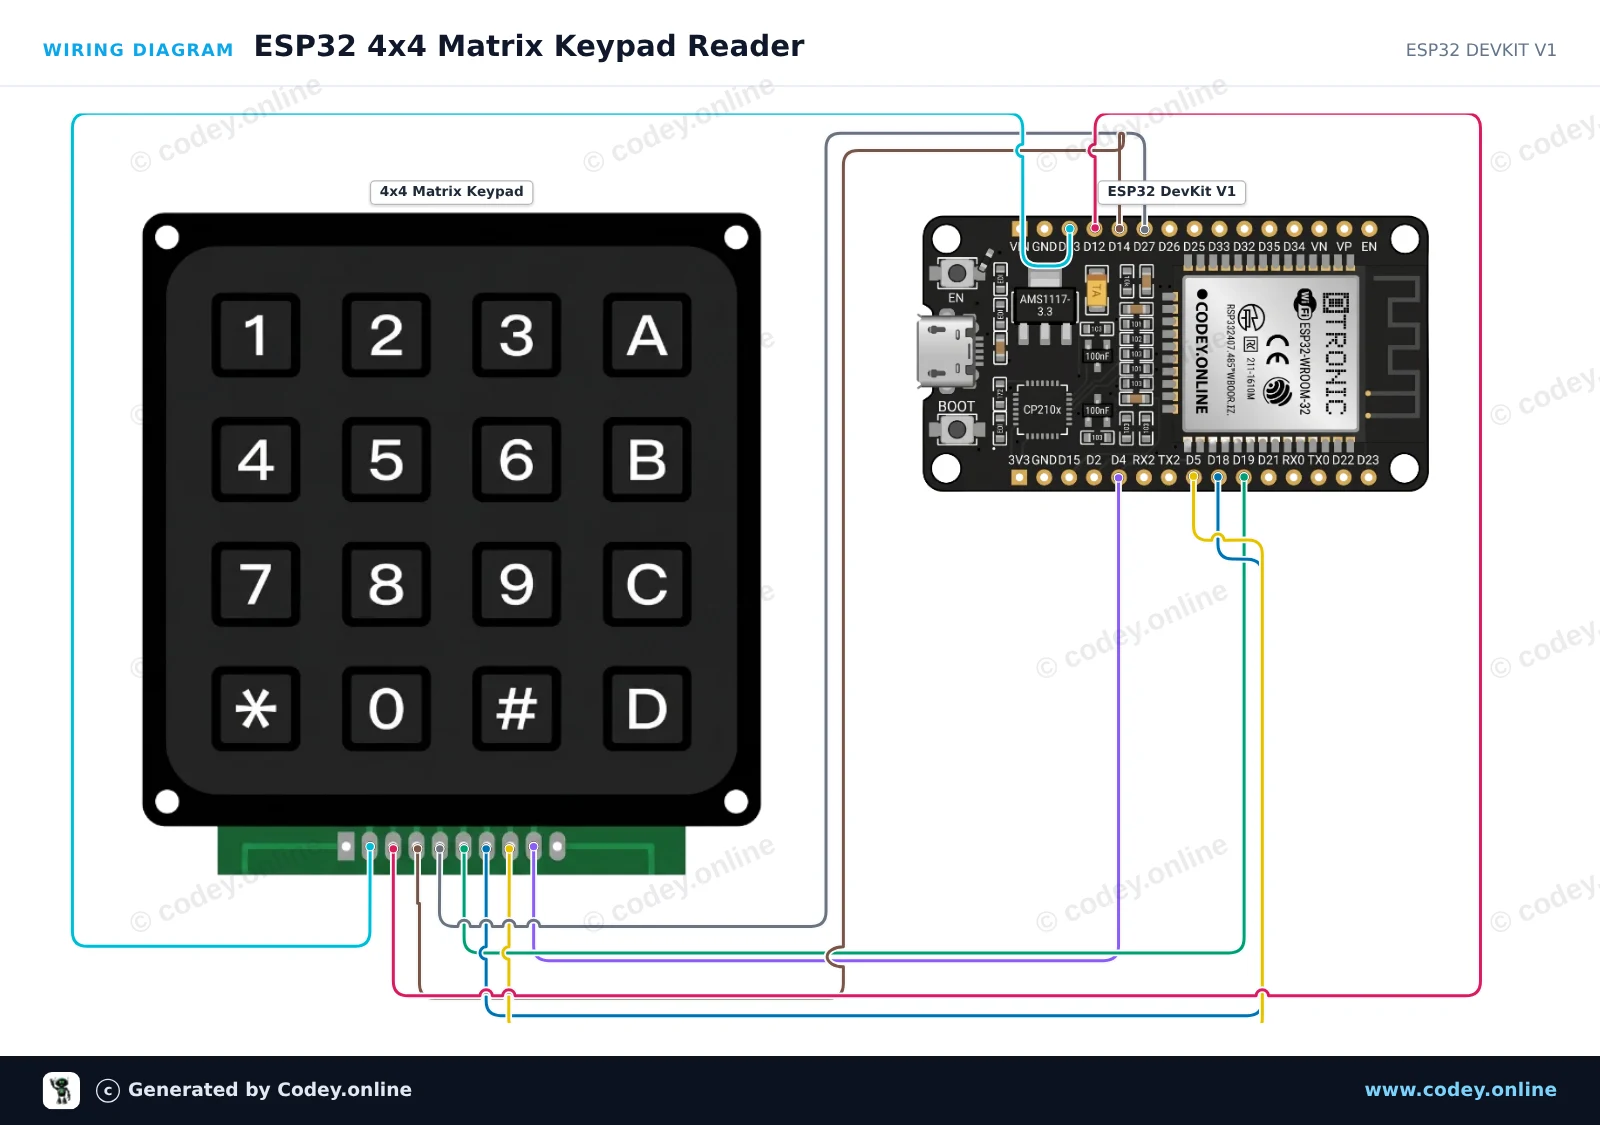
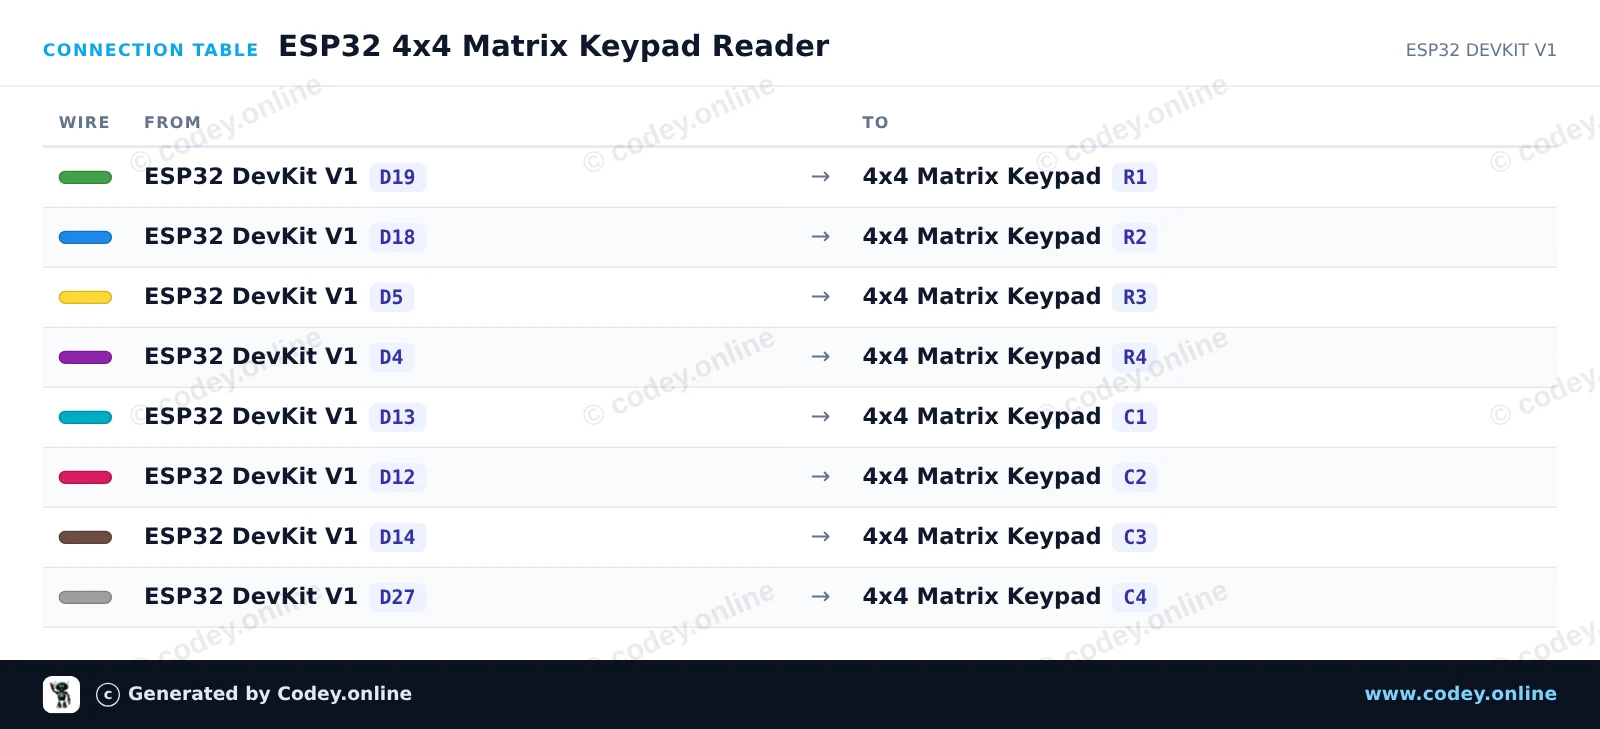
This circuit connects a 4x4 matrix keypad directly to the ESP32 GPIOs. The Keypad library scans the matrix rows and columns using internal pull-up resistors. Pressing any key prints its character to the Serial Monitor in real time.

Wiring diagram: 4x4 black matrix keypad on an ESP32 DevKit V1
Wiring diagram · Click to enlarge
Connection table: 4x4 black matrix keypad on an ESP32 DevKit V1
Connection table · Click to enlarge
ESP32_4x4_Matrix_Keypad_Reader.ino · compiled and verified
/*
 * ==================================================================
 *  Generated by Codey.online  —  https://www.codey.online
 * ==================================================================
 *  Project   : ESP32 4x4 Matrix Keypad Reader
 *  Board     : ESP32 DEVKIT V1 (esp32:esp32:esp32doit-devkit-v1)
 *  Parts     : Keypad 4x4
 *  Libraries : Keypad 3.1.1
 *
 *  Codey Online is an AI-powered browser IDE for Arduino and ESP32.
 *  Describe your project and Codey writes the code, draws the wiring
 *  diagram and uploads it to your board, straight from the browser.
 *  This code is free to use, modify and share, without warranty.
 * ==================================================================
 */

#include <Keypad.h>

const byte ROWS = 4;
const byte COLS = 4;

char keys[ROWS][COLS] = {
  {'1', '2', '3', 'A'},
  {'4', '5', '6', 'B'},
  {'7', '8', '9', 'C'},
  {'*', '0', '#', 'D'}
};

byte rowPins[ROWS] = {19, 18, 5, 4};
byte colPins[COLS] = {13, 12, 14, 27};

Keypad keypad = Keypad(makeKeymap(keys), rowPins, colPins, ROWS, COLS);

void setup() {
  Serial.begin(115200);
  Serial.println("4x4 Keypad Test Ready. Press any key...");
}

void loop() {
  char customKey = keypad.getKey();

  if (customKey) {
    Serial.print("Key pressed: ");
    Serial.println(customKey);
  }
}

Required libraries: Keypad 3.1.1

Wiring diagram and example code generated by Codey.online — https://www.codey.online

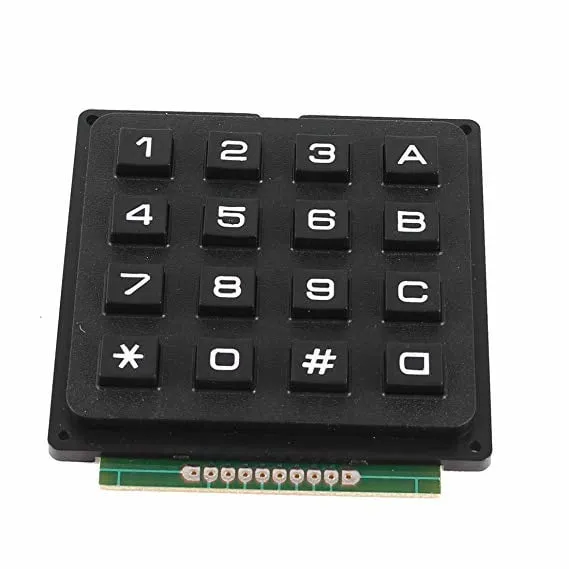
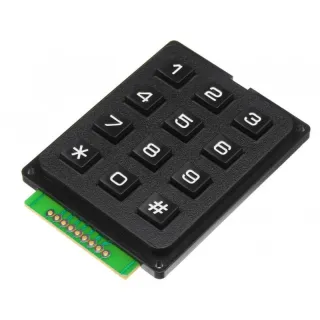
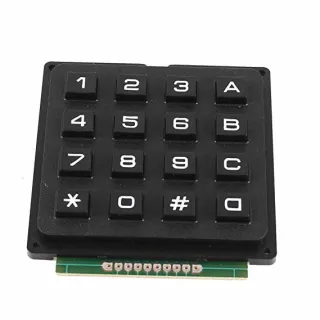
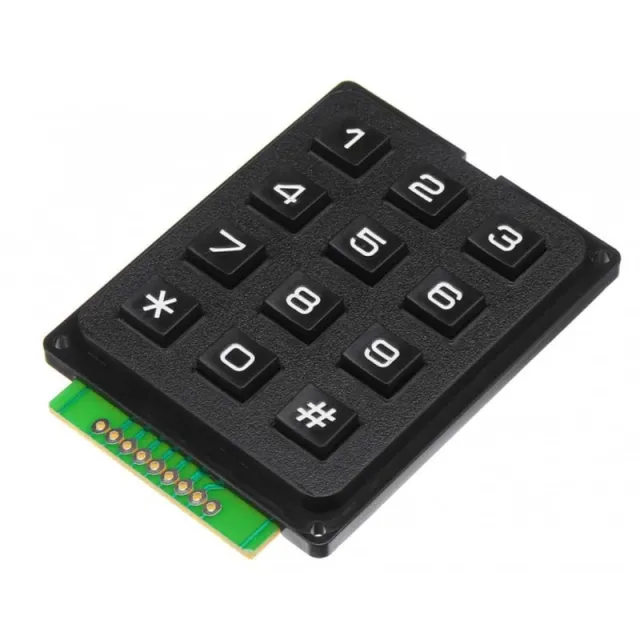
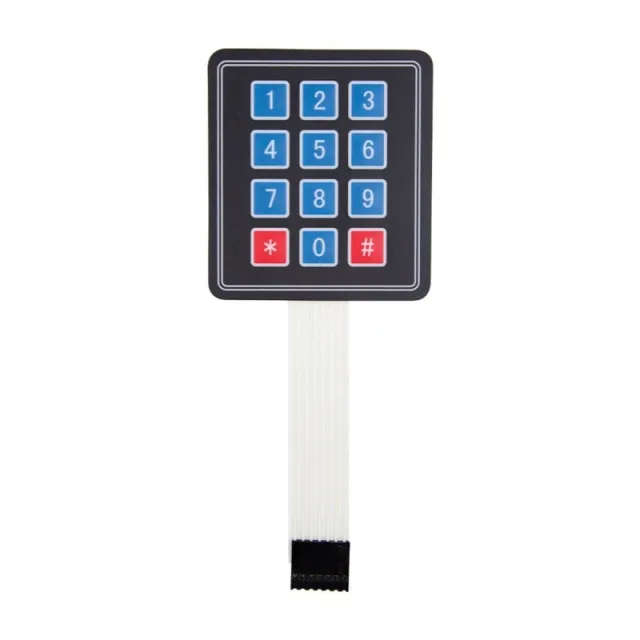
4x4 black matrix keypad

Keypad with plastic keys. Ideal, for example, for entering an access code.

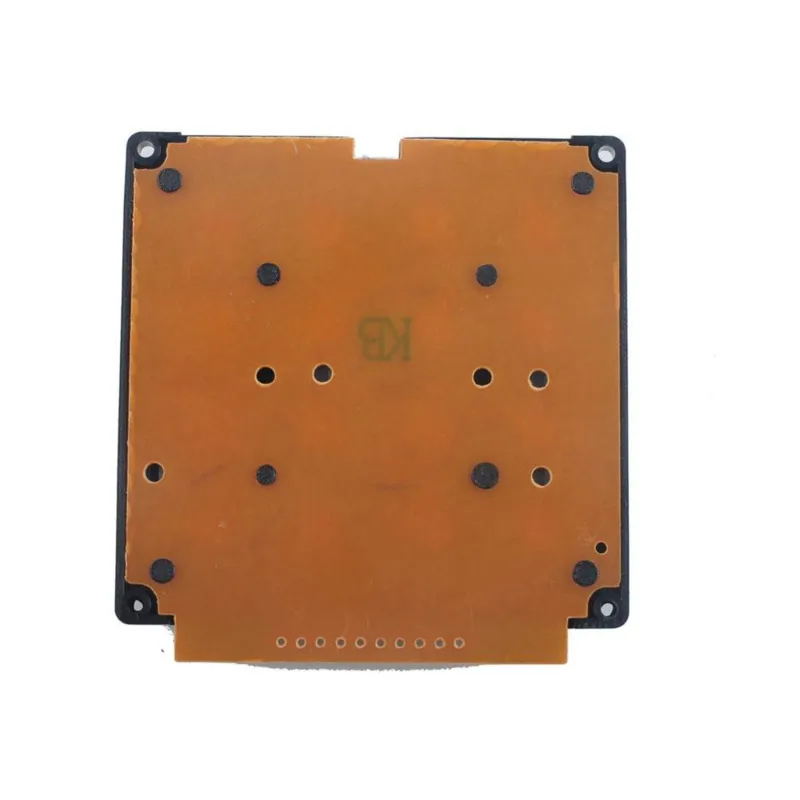
The keypad has membrane switches and all buttons are numbered 0-9, and the characters * and #. On the right there are 4 more buttons with A, B, C and D

The module is very suitable for built-in installation. The module also has four 2mm holes for mounting.

Dimensions
Length: 6.9cm
Width: 6.5cm
Height: 1cm

  • Membrane switches
  • 6,9 x 6,5 cm
  • Height 1 cm
  • 4 mounting holes

Why choose this product?

  • For access codes – Ideal for entering access codes.
  • All keys numbered – Keys 0-9, * and #, plus A-D.
  • Suitable for flush mounting – Highly suitable for flush mounting in projects.
  • Mounting holes present – Equipped with four 2 mm holes.
Specifications
Width6,5 cm
Colorblack
Materialplastic
Length6,9 cm
Height1 cm
Hole diameter2 mm
Mounting holes4
Number of keys16

Frequently bought together

Total: € 12,25

Reviews

★★★★★ 4,5/5 2 reviews
  • ★★★★★Tom Nieuwenhuizen

    more solid than I expected for the price

  • ★★★★★Leo Lugt

    I haven't used it yet, and it will probably be a while before I do. I assume it will be fine.

Write a review
Your rating

Shipping & returns

Shipping

  • Parcel with track & trace€ 7,70Within 24 hours
  • Pick up at PostNL location€ 7,40Within 24 hours
  • Letterbox parcel€ 3,70Within 2 business days
  • Letterbox parcel 24 hours€ 4,55Within 24 hours
  • Pick up in storeFree
All about shipping

Returns

Not satisfied? You have 30 days after delivery to return the product.

All about returns

Recently viewed